
DIY Fabric Covered Easter Eggs
2021 Mar 31st
Get “egg-cited” for Easter with this fun, easy DIY project!
For many, decorating Easter eggs is a family tradition. But if you dread the messy dyes that accompany the craft, these fabric-covered eggs are a great alternative. Plus, there’s no need to waste a good egg in the making, and you can reuse your creations next year.
So let’s hop to it!
How to Make Fabric Covered Easter Eggs
What you’ll need:
- Scissors
- Mod podge or glue
- A paintbrush
- Measuring tape
- Fabric scraps
- Styrofoam or plastic eggs
Step 1:

Measure the height and circumference of the egg.
Step 2:
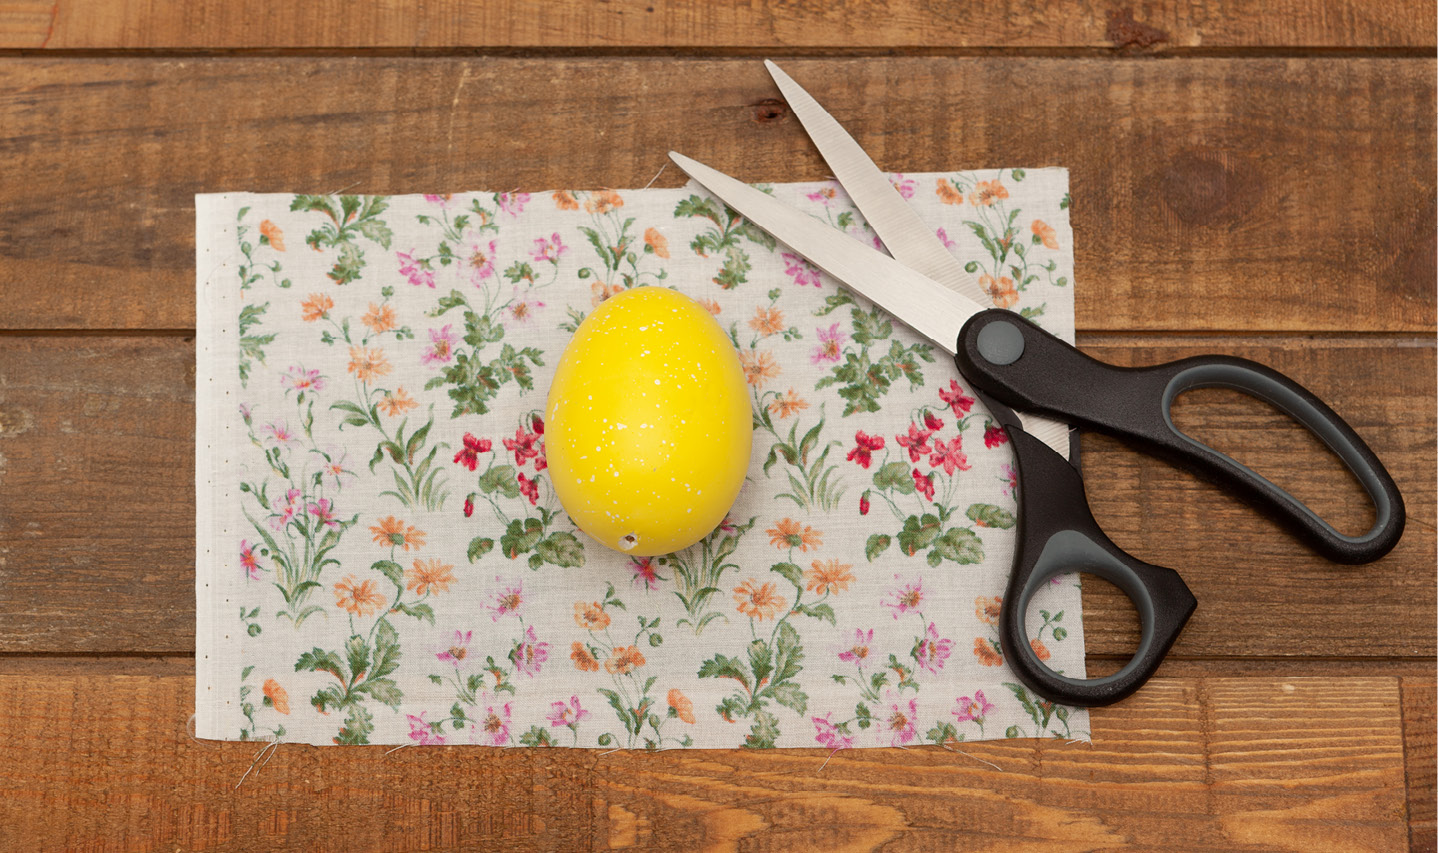
Use these measurements to cut a rectangle of fabric.
Step 3:
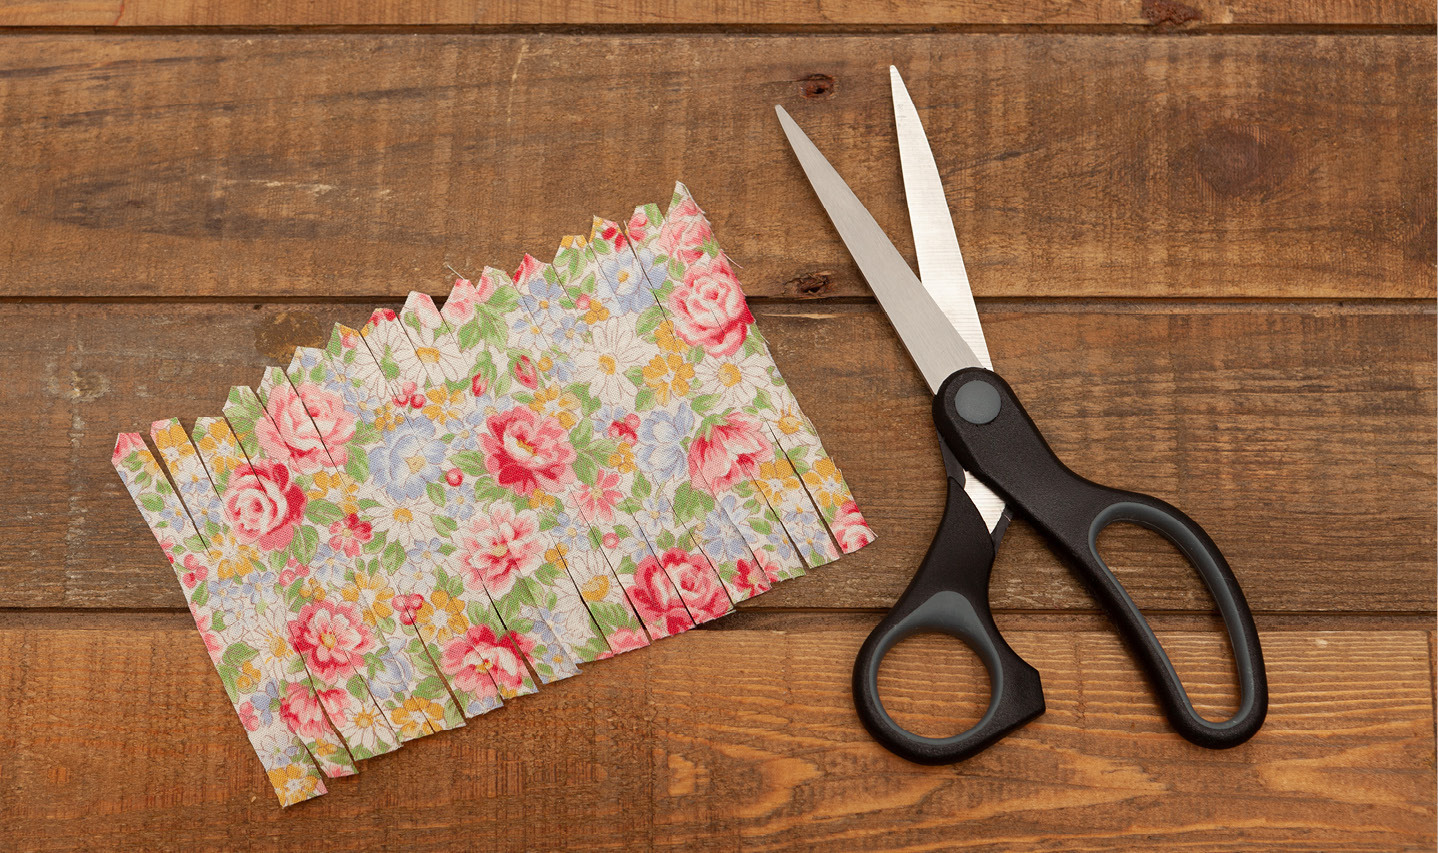
Cut slits along both sides, making sure to leave about ½" to 1" in the middle, depending on size. Cut the end of each strip into a point.
Step 4:
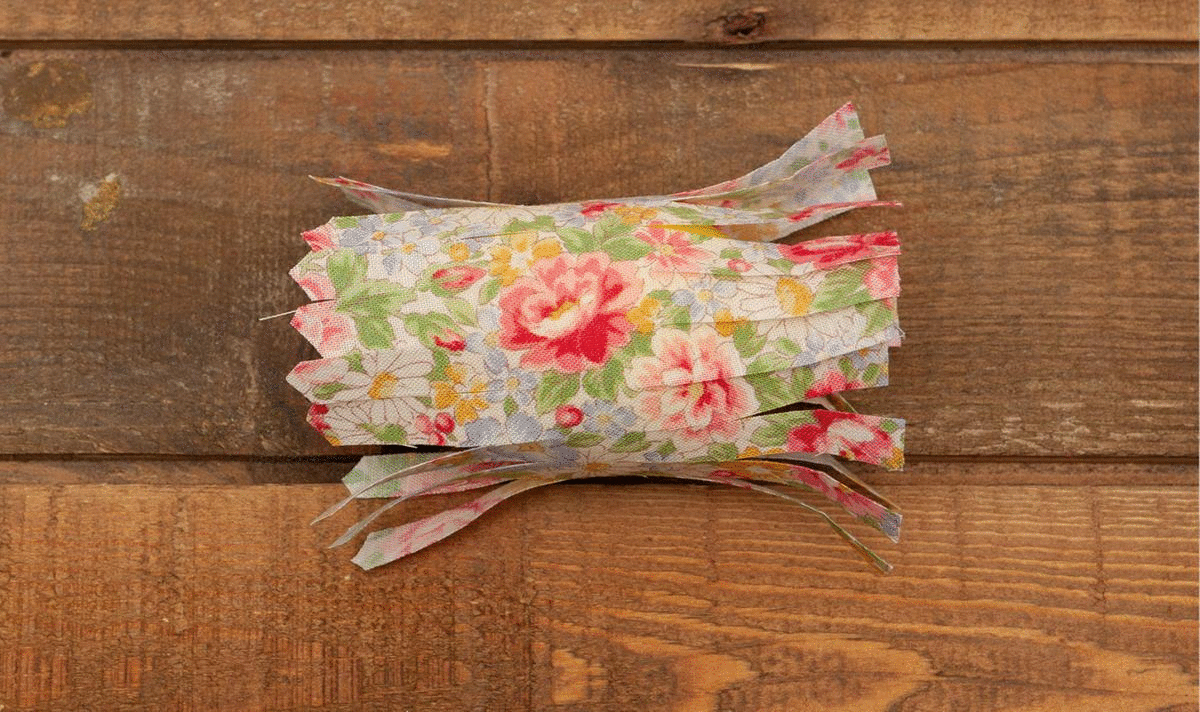
Apply mod podge to the uncut area using a paintbrush. Wrap the fabric around the egg with the points facing outwards. Apply mod podge to the slits and press them down. Let dry.
Step 5:
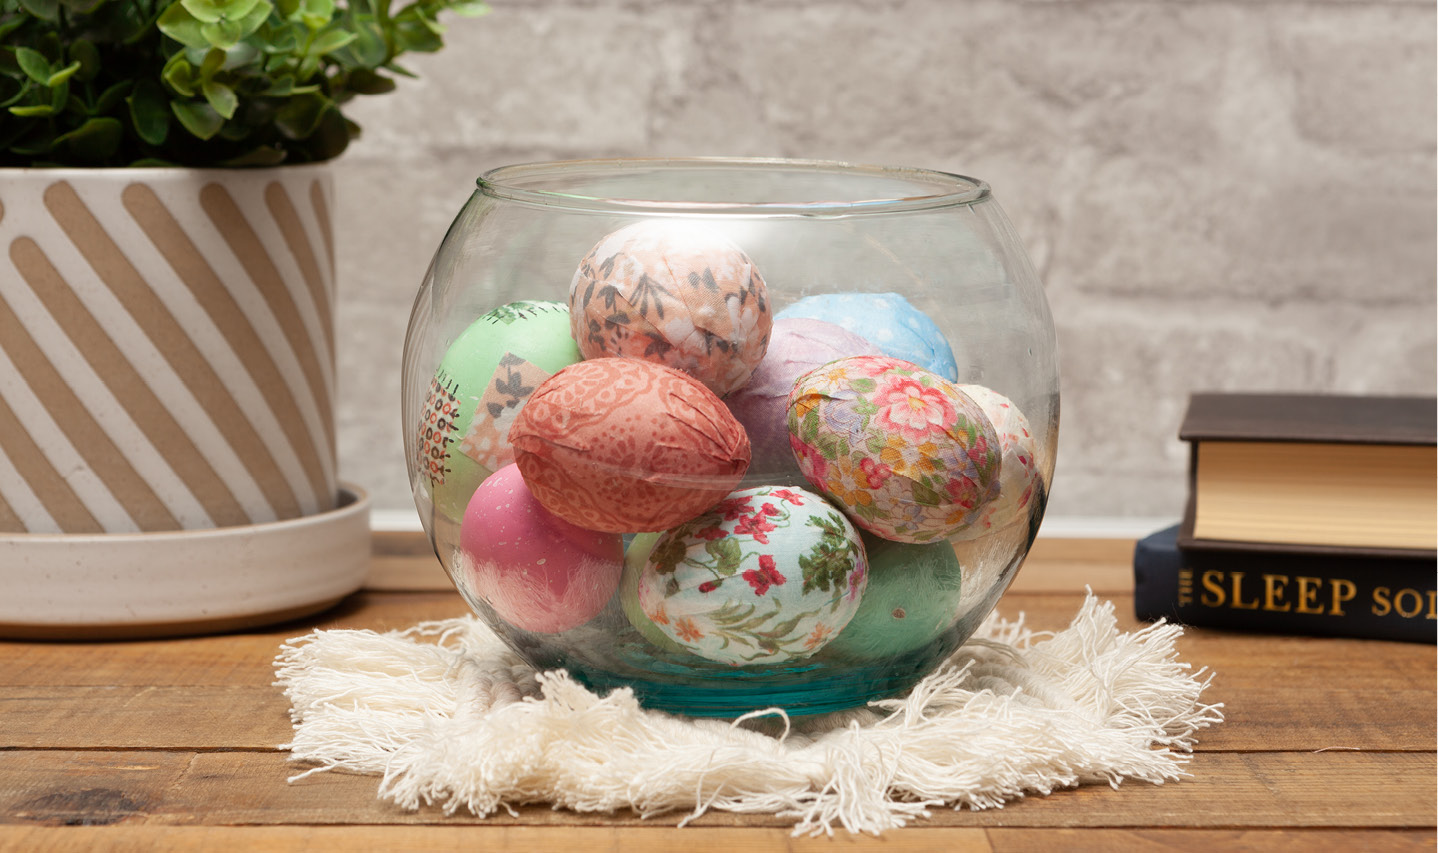
Decorate your home with festive fabric covered eggs and enjoy!
Happy Easter Long Weekend!
Whether you’re crafting or relaxing, we hope you have a wonderful Easter long weekend!
If you do decide to tackle some fabric-covered eggs, don’t be afraid to get creative. Regular printed paper and "washi” paper would work well for these too. Or you could mix things up and try a combo of both.
When you’re all done, add your eggs to a glass vase and place on the mantel, use as a centerpiece, or scatter around your home for a chocolate-free egg hunt!
Gave this project a try? We'd love to see what you created — tag us on social #MyQEStyle!