How To Wrap Your Presents Without Gift Wrapping Paper (Using Fabric!)
2021 Dec 17th
Get ready for a simpler, softer, and sweeter way to wrap your presents!
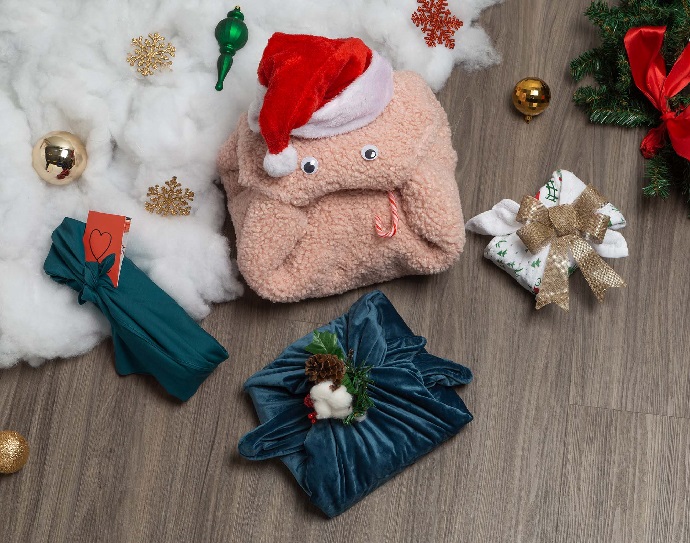
Everyone loves a personal touch to their gifts, and with a little DIY magic, you can add your special uniqueness to the wrapping of the gift itself. After all, gift wrapping paper can be one of the more frustrating, impersonal, and wasteful parts of the holidays ー as well as being annoying to clean up.
If you’re looking for a more memorable and eco-friendly way to present your gifts, one of the best solutions is to learn how to make furoshiki, a Japanese style of cloth wrapping that makes for beautiful gifts that are gentler on the planet.
This cultural art dates back as far as 710 BC, and initially used unique fabrics that showcased family crests and symbols. During the 15th century, this style of wrapping was used with kimonos in bathhouses to keep clothes safely together, and it eventually grew as a way to wrap everything from books, to gifts, to even lunches!
If you have some old leftover bedding that you don’t mind parting with ー or want to stylishly add a brand new pillowcase or cushion cover to your gift ー you should have everything you need to make furoshiki. Our step-by-step gift wrapping guide will show you how to wrap your presents with stylish fabric, and how to decorate them to fit the holiday spirit!
How To Wrap Square Gifts
For a simple and stylish interpretation of furoshiki, this take on the traditional ‘otsukai tsutsumi’ furoshiki wrapping will be exactly what you need. For easy results, it’s best to use a large square piece of fabric like a euro sham, or a cut duvet cover you might be ready to part with!
Step 1: Lay a square cushion cover or pillowcase flat in the shape of a diamond on your floor or table, and place your gift on the center.
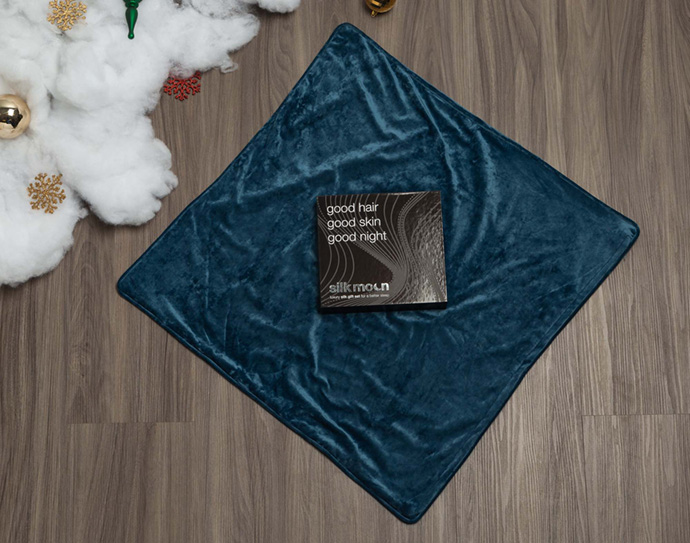
Step 2: Fold the top corner of your fabric over your gift, and then fold the bottom corner over all of that. Feel free to tuck any extra fabric in for a tighter look!
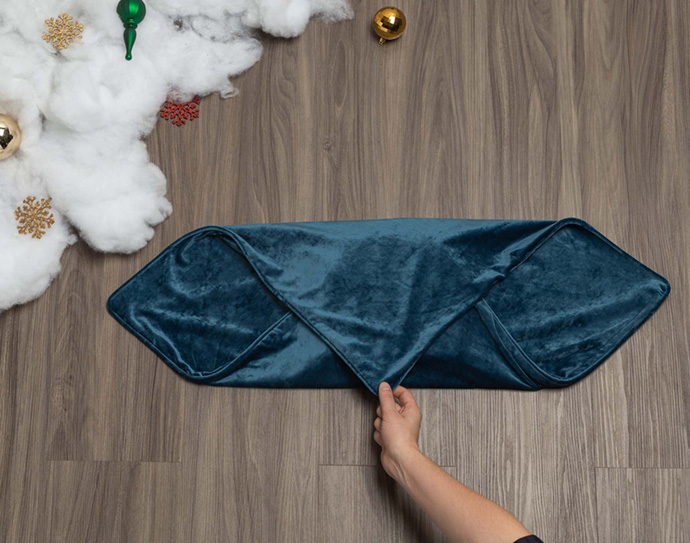
Step 3: Tie the left and right corners together over the gift into a knot, making sure to pull tight enough for it to be secure ー if you’re worried that you’re bending or putting too much pressure on your gift, you might need a larger piece of fabric.
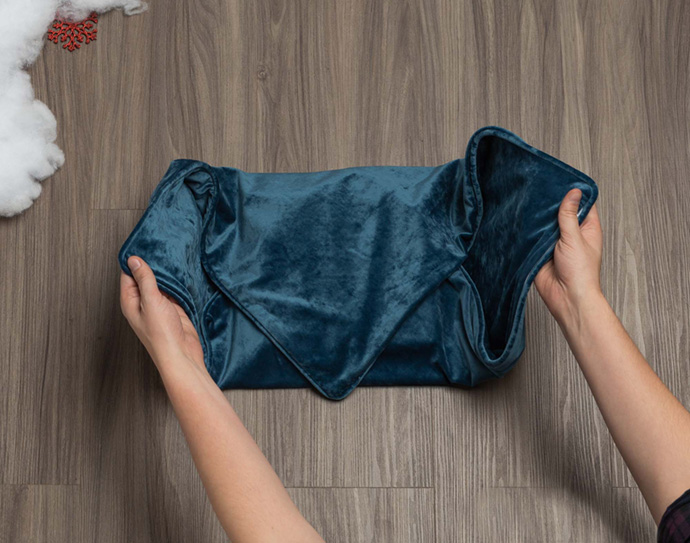
Step 4: Decorate by putting things within the knot! Simple decorations like a small bit of mistletoe can make for a wonderful wintery accessory that fits right in!
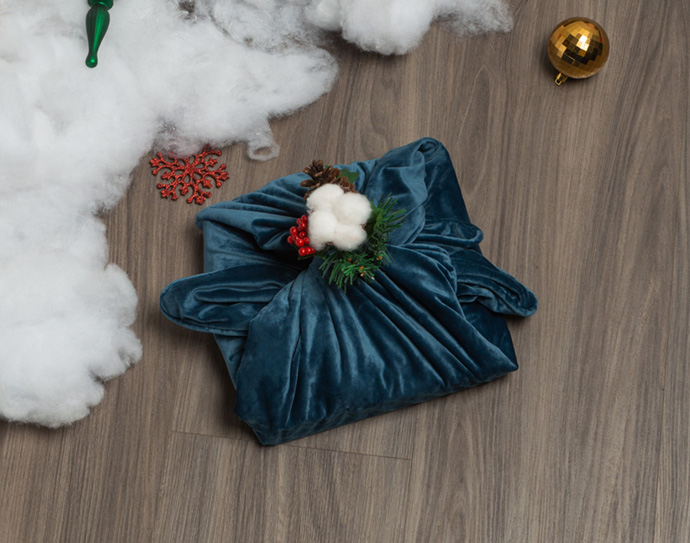
How To Wrap Long Gifts
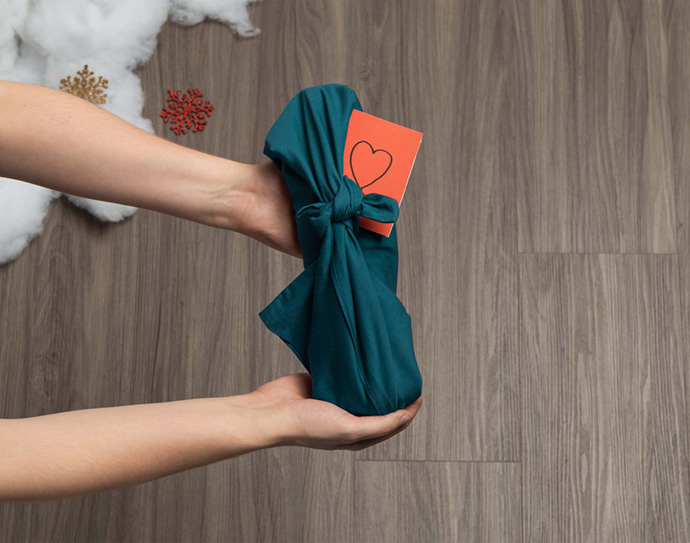
For longer gifts (like thin boxes or bottles), this fashionable style called ‘entou tsutsumi’ will let your gifts stand tall thanks to its stylish center knot! You can also get great results using queen or king-sized pillowcases, since their rectangular shape makes for a more convenient length.
Step 1: Lay down a pillowcase or pillow sham like a diamond, and place your bottle or long box at the bottom corner.
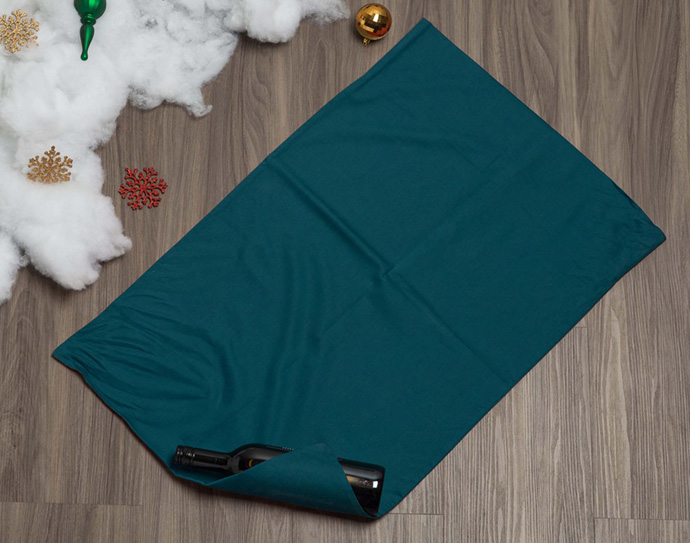
Step 2: Slowly roll your gift with the corner, all the way towards the top corner, until you have a perfect cylinder.
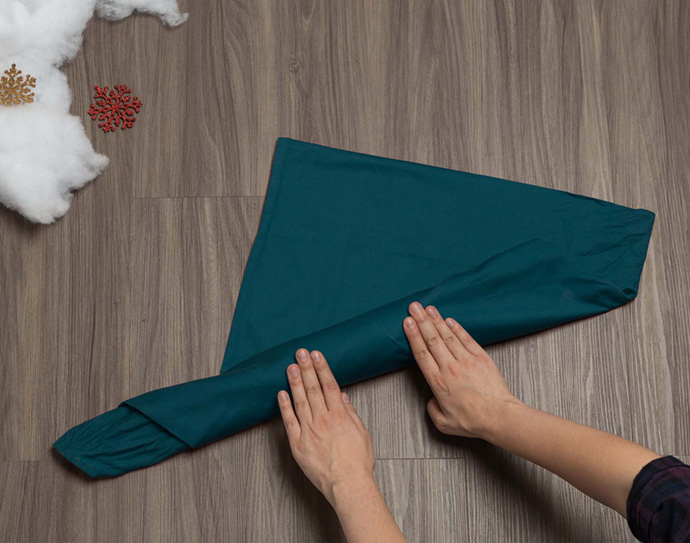
Step 3: Tie the left and right corner together across the bottle, tightening it as much as you can without breaking or bending the box.
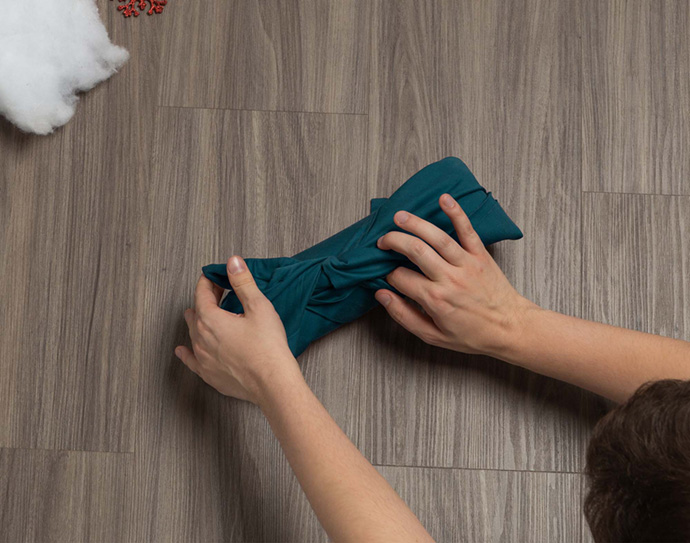
Step 4: This wrapping style might be particularly hard to fit decorations into, but it’s a great opportunity to integrate your accompanying card! With the long stretch from the knotted ends, you should be able to slip your card right in.
How To Wrap Small Gifts
You might think it’d be easiest to wrap your smaller presents similar to a square gift, but wrapping these items in the style of longer gifts through ‘entou tsutsumi’ can help maintain your item’s shape. You can even use a tea towel for a more iconic look ー and as a sneaky extra gift!
Step 1: Lay out your small fabric in a diamond shape, and place the gift on the bottom corner. Then, gently roll your gift from the bottom corner towards the top corner.
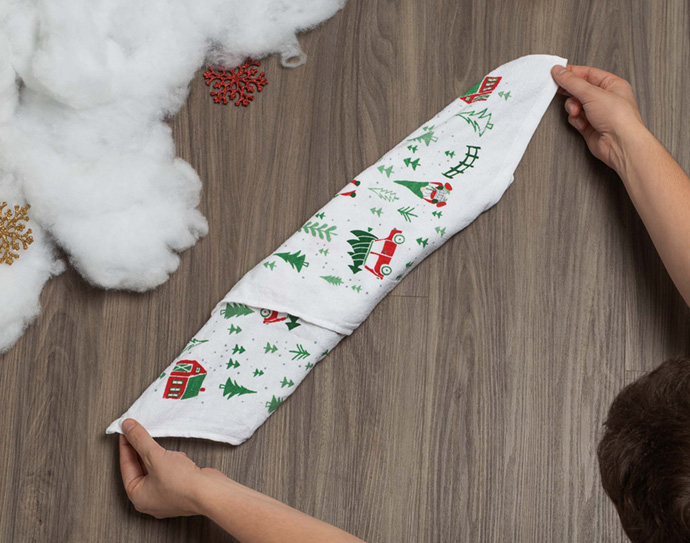
Step 2: Tie the left and right sides together over top of the gift, as tight as you can without bending or breaking the gift inside.
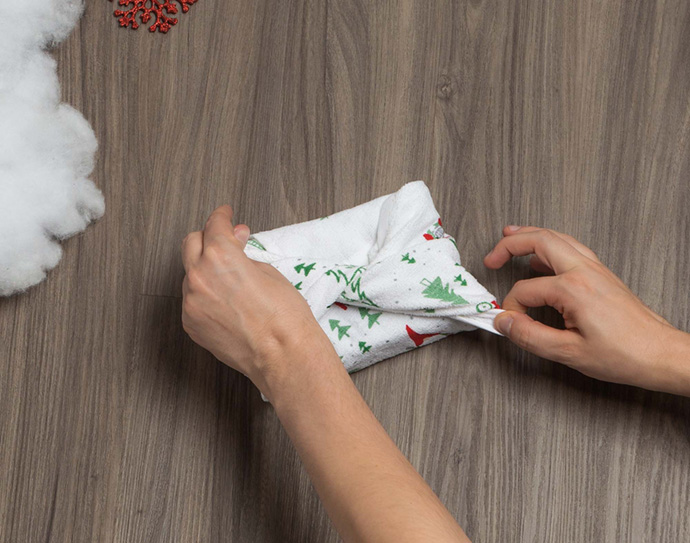
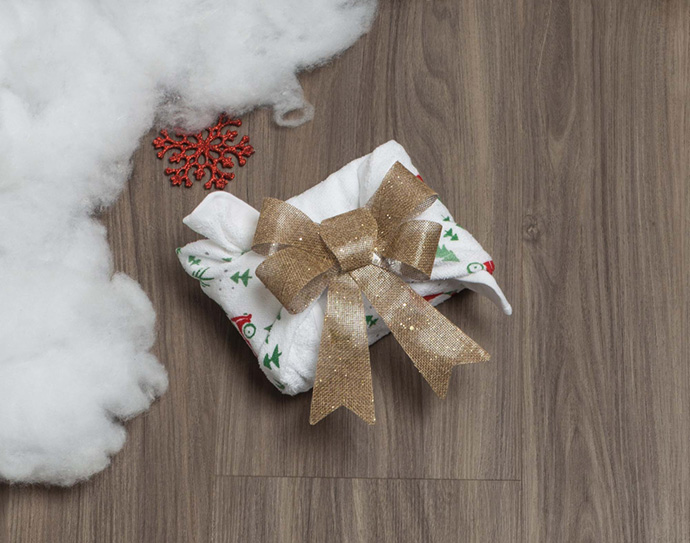
Step 3: This tighter fit should have a little more shape with the box it comes in, with the top featuring a full knot! However, this tight space means you can make the most out of subtle accessories, such as a nicely-fitting bow to fit over the tie.
How to Wrap Multiple Gifts
With several small gifts, you don’t want to be squishing them together too much, so this ‘hira tsutsumi’ style of furoshiki is totally knot-free! Much like square gifts, this technique usually works best with a euro sham, pillowcase, or another square piece of fabric.
Step 1: Lay your fabric down as a diamond, and place your gift in the center.
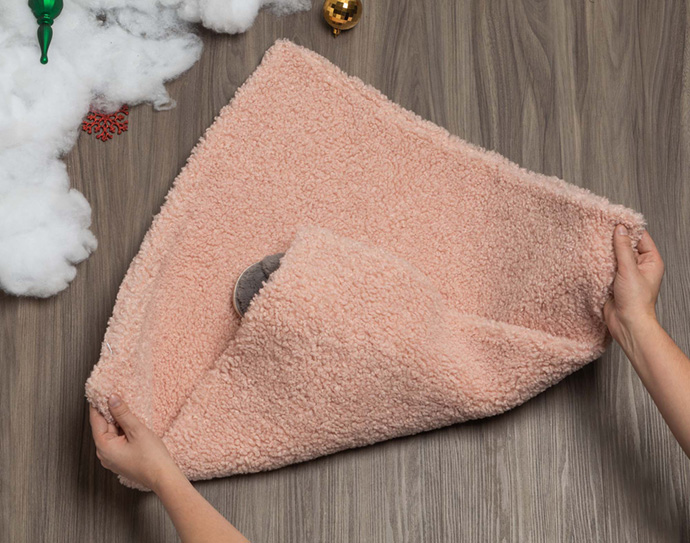
Step 2: Pull the bottom corner of the fabric over and around the gift, tucking the corner tightly underneath. Then, drape the left and right corners overtop the gift.
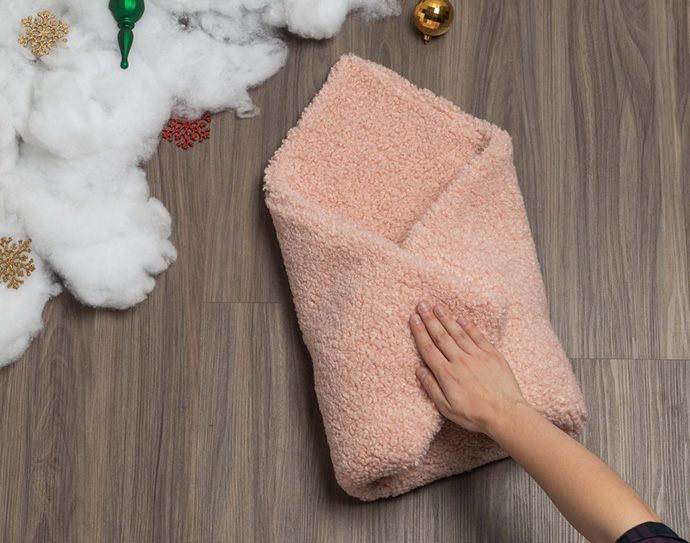
Step 3: Grab the top corner and pull it over the gift, and stuff it into the space between where the bottom corner goes in, and the side corners are draped over. Tuck any extra fabric in to make it extra neat and tidy.
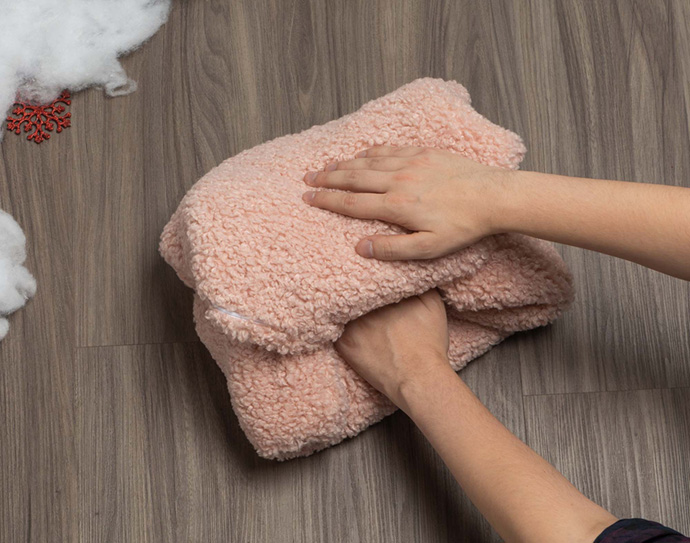
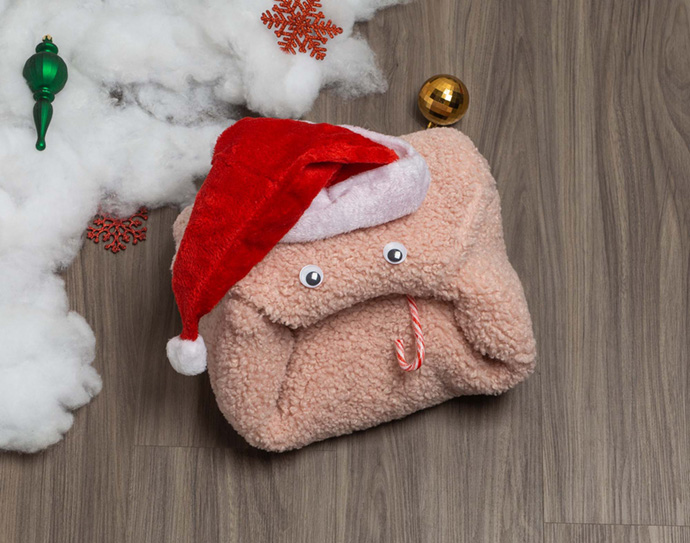
Step 4: Depending on how fluffy your fabric is, your present should have the perfect shape to make a lovely little face! Rather than hiding this silly gap, embrace it as a mouth by giving it some personality, with friendly eyes to bring it to life and some fancy headwear for holiday spirit!
If you want to stay tuned for more DIY ideas, subscribe to our mailing list so we can keep you posted on all our best seasonal crafts! Plus, be sure to also check out any of our 70+ stores, so you can replace all the old sheets and covers you just used for your gifts.
Happy Holidays!
