DIY Lamp Shades From Upcycled Bedding
2023 Jul 16th
When it comes to interior design, even the smallest details can make a big difference. One often overlooked element is the lamp shade. A well-chosen lamp shade can transform the ambiance of a room and add a touch of personality to your space.
If you're looking to create a unique and eco-friendly lamp shade, why not consider upcycling your old bedding? In this blog post, we'll guide you through the process of making DIY lamp shades from upcycled bedding, giving new life to your old fabrics.
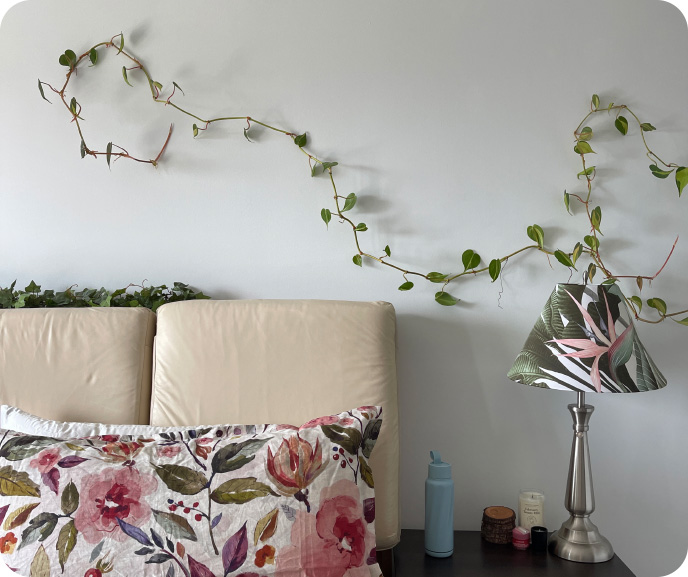
We adore the delightful botanical combination! Marsala and Cerritos blend seamlessly in this plant-inspired space.
Materials Needed:
- Old bedding (sheets, pillowcases, or duvet covers)
- Lampshade frame
- Scissors
- Hot glue gun
- Iron
- Ribbon or trim
- An extra pair of hands will make certain steps easier!
Follow the steps below, and watch the video to see us making it in the QE home studio!
Step 1: Prepare Your Materials
Gather your old bedding and choose a fabric that matches your style and complements your existing decor. Consider patterns, colors, and textures that will add visual interest to your lamp shade.
Tip: Be sure to select a lampshade frame that fits the size of your lamp base!
Step 2: Measure and Cut
Place your fabric wrong side up. With a pen, mark the circumference of your lampshade frame by rolling it in a circle, and outlining the bottom of your lampshade frame. Repeat with the top, marking a line where the smallest end of the lampshade meets the fabric. Add an extra inch to both measurements for seam allowance - these third and fourth lines are your cutting lines!
Now that your two circle measurements are marked, cut the largest circle. Next, cut toward the smallest circle in a straight line, and cut this out, remembering to leave seam allowance.
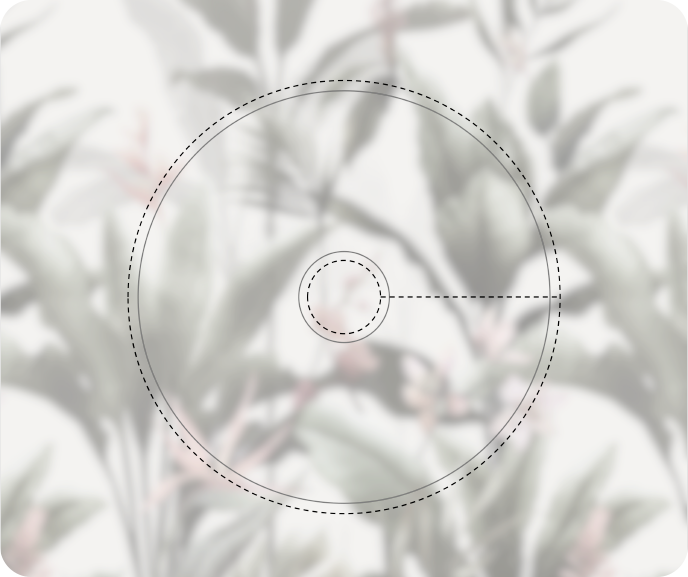
Your fabric should look something like this (the dotted lines are your cutting lines)
Note: The above method is specifically designed for a tapered drum lampshade.
Step 3: Attach the Fabric to the Frame
Apply fabric glue along one edge of the fabric and attach it to the lampshade frame, starting from the seam at the back. Hold or secure it in place until the glue sets.
Next, wrap the fabric around the frame, securing it with fabric glue as you go. Ensure that the fabric is taut and smooth to avoid wrinkles.Once the lamp shade has been fully covered, trim a clean edge vertically with scissors. Create a small inward fold with the edge of your fabric to form a neat edge, and glue. Use an iron to create a flush surface, being careful to use the correct heat setting.
Step 4: Create a Clean Edge
Now, use the extra fabric at the top and bottom of your lampshade (this is the seam allowance) fold the fabric neatly over the top and bottom edges of the frame, gluing it down to create a clean edge. Trim any excess fabric if necessary. For a neat finish, glue ribbon over the top to hide these raw edges.
Step 5: Let It Dry
Allow the fabric glue to dry completely, following the manufacturer's instructions. This step is crucial for ensuring that your lamp shade stays securely in place.
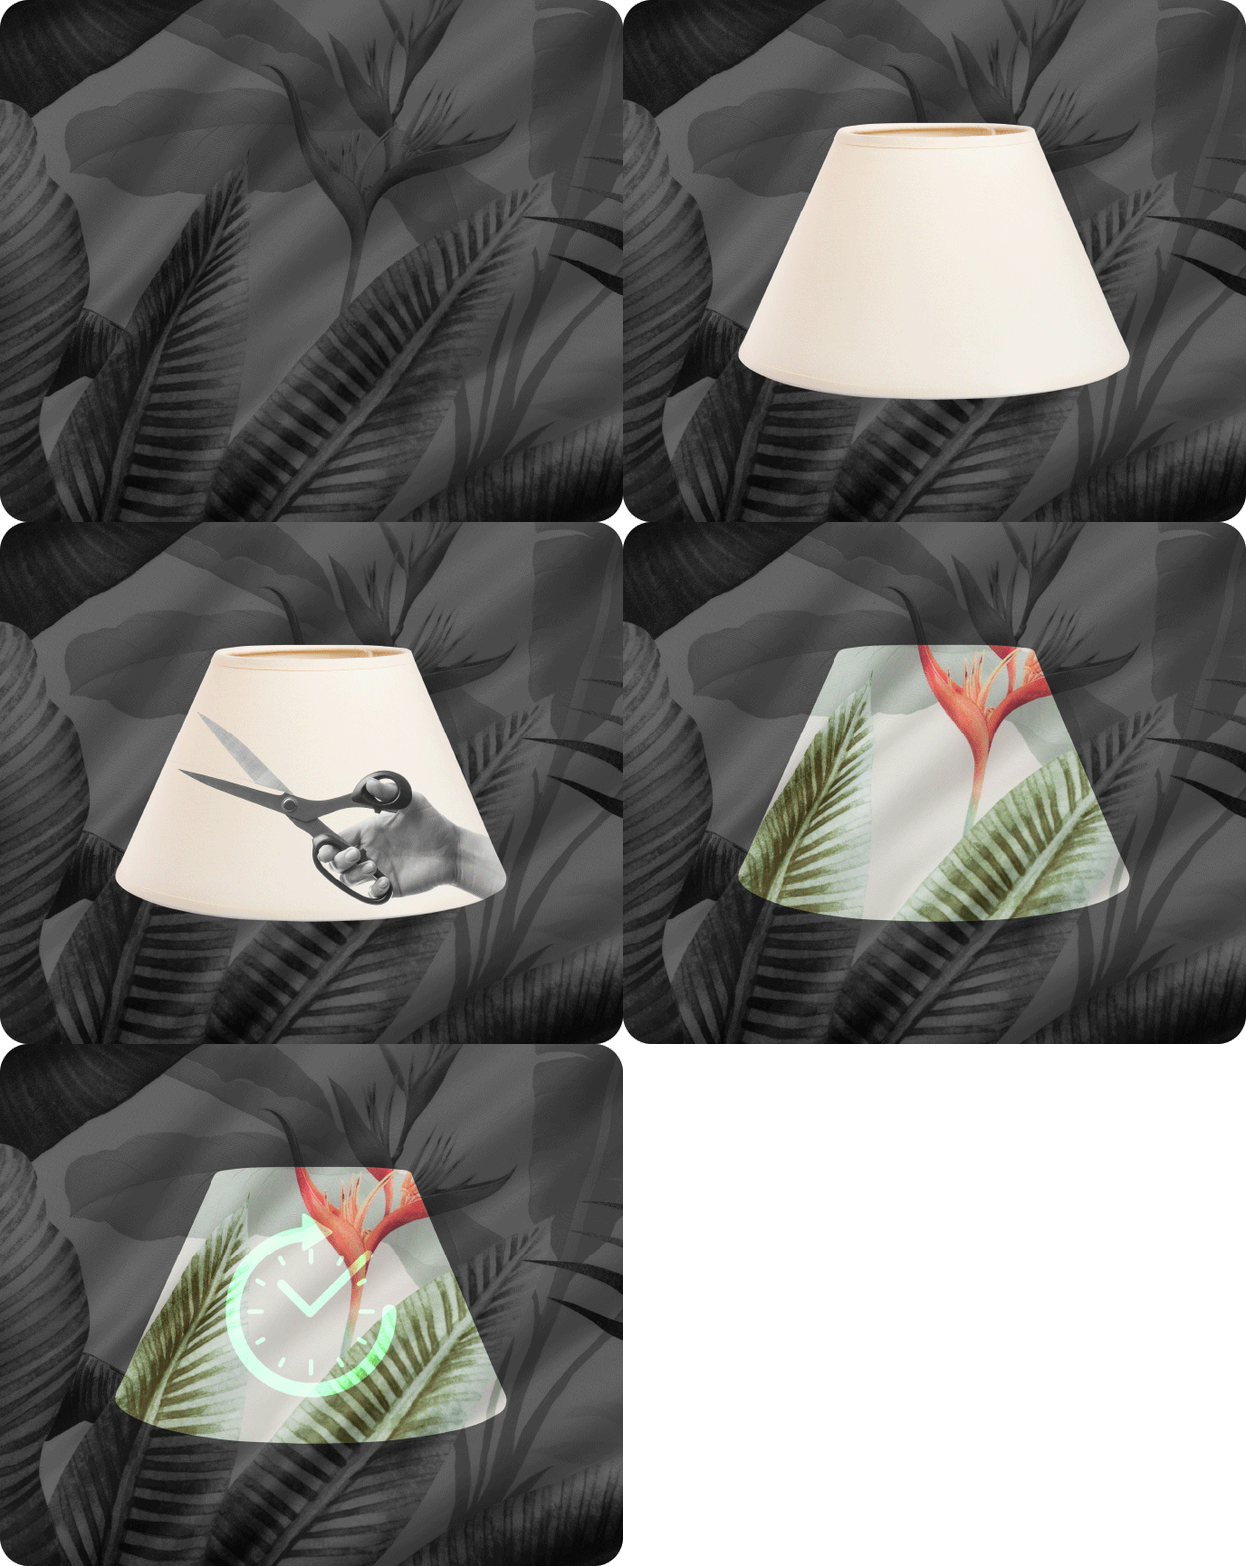
Step 6: Install and Enjoy
Once the glue is dry, attach the lampshade to your lamp base. Turn on the light, and admire your beautiful, eco-friendly creation!
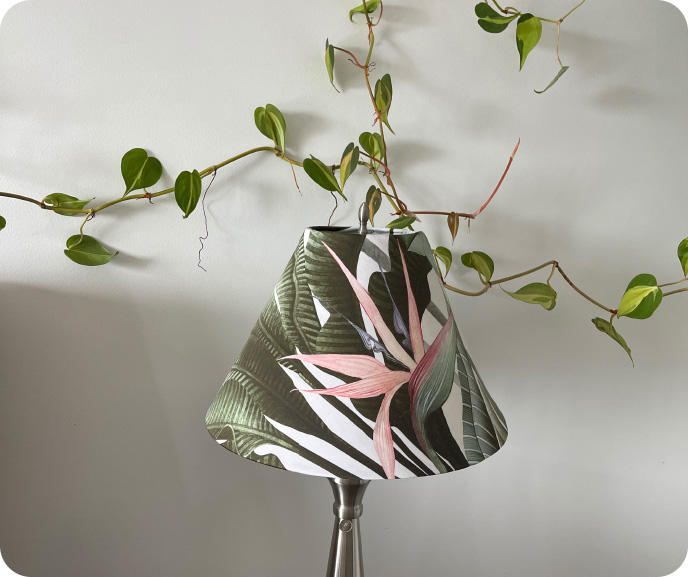
This DIY lampshade features the tropical printed fabric from our Cerritos collection.
By upcycling your old bedding, you not only create a unique lamp shade but also contribute to sustainable living by reducing waste. Plus, you'll have a one-of-a-kind piece that adds character and (eco-friendly) charm to your home decor.
So, instead of throwing away your old bedding, give it a new purpose and brighten up your space with a DIY lamp shade. Get creative, experiment with different fabrics, and let your imagination shine!
Remember, the possibilities are endless when it comes to upcycling. So, roll up your sleeves, gather your materials, and start transforming your old bedding into stunning lamp shades that will illuminate your home with style and sustainability!
